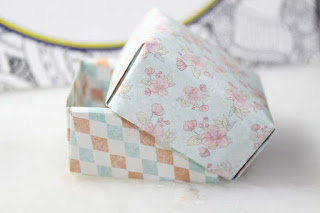
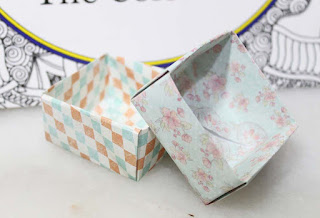
How to make a Simple Paper Box (DIY)
When it comes to folding paper
into something, a box is one of the classics. My mom taught me how to make a
box out of paper when I was about 7 years old. She had so many versions and
variations of how to make it, something I think that have been passed on from
previous generations. Years passed.. and It was one of my friend’s birthday,
when I got the gift it was fairly big, and I couldn’t find a good looking box
on the market at the time to fit it. So I decided to make my own. My mother’s
version of folding a piece of paper into a box now needed an upgrade.. so I
resorted to Google. And out of hundreds if not thousands of methods that I
discovered to make a paper box, I found the one that does not require any
printing or complicated math, and above all I could customize it to make the walls a little more sturdy since I was blowing up the measurements times 10.
For the sake of demonstration,
I’ve used standard Origami Paper that I got from Alwan, but you
can use any kind/size of paper you want. To make a bigger box I use bigger size
sheets that can get up to A1 then cut the longer size down so that the sheet is
square. To do this I use a long ruler to mark where I need to cut and then use the
same ruler to measure a 90 degree angel and cut with a cutting blade.
Take into consideration that one
of the two sides of the paper will be completely hidden inside the box; you can
use this side to mark where you’re going to fold. If you do not mind the paper
creases you can always fold over the paper to mark it.
1. Mark an X at the middle of you paper. Start with a line from the
upper left corner to the lower right corner. Add another line from the upper
right corner that ends at the lower left corner.
2. Fold all of the four corners to the center of paper where so
that they all meet at the center of the X.
3. Unfold any of the two sides but they must be opposite each other
and not side by side. This will leave you with a hexagon shaped paper with a
straight line running through the middle.
4. Make sure that this line is vertical, then fold the right and
left sides of the paper so that they meet at the marked line. Unfold them so
you are left with two creases.
5. Fold the bottom of the hexagon upwards until the tip of the
corner meets the upper crease. Rotate and do the same for the other side.
Unfold them so you are left with crease.
6. Now this is where it gets a little tricky. Go back to your hexagon shape, start dotting a line from the bottom of the right hand side along the folded paper until it meets the first crease and stop there.
8. Now you need to fold the dotted line down. If you are using
thick paper you can use a bone folder to make it easier.
9. Rotate upside down and repeat again.
10. Now all you have to do is fold down the upper and lower sides
that are now outside your box, fold them down so that they meet the original X
that you had marked in the middle.
This is the basic idea of the box,
I always use the same technique to create even bigger boxes. But sometimes I
would add card board inside the base and the sides of the box so that it has
enough support if the gift is heavy. Also when making bigger boxes I normally
use glue to stick everything together at the end.
Using the same technique but with
a slightly bigger paper square you can also make a lid for this box.
You can then any embellishment or
decoration you want to it.


Comments